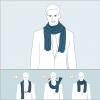
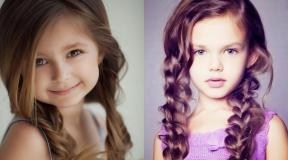
Beautiful hairstyles with elastic bands. Original hairstyles with elastic bands for girls Easy hairstyles with small elastic bands
When getting a girl ready for kindergarten or school, elders often do a neat hairstyle with an elastic band.
This does not require much time or great skill. In such models, the hair must be securely secured so that it has a minimum of freedom.
Otherwise, the child may accidentally damage them. The most suitable hairstyles for little girls are ponytails or braids for medium or long curls. Short haircuts also look good.
Hairstyles for hair of any length with an elastic band are very popular.
This fact is explained by the following considerations:
- minimum time;
- versatility;
- saving.
To do everyday hairstyles for little girls or women of any age, you don't need expensive tools and accessories.
All you need is a few rubber bands, a comb, patience and the desire to get results. When you don’t have a beautiful rubber band at hand, you can easily make it yourself.
Hair gathered into a model using elastic bands will look great both in the office and in a nightclub.
An important feature of hairstyles that are formed using elastic bands is their simplicity. To get your hair in order, 12 minutes is enough.
Hairstyles of this type can be easily done with your own hands, even in cases where a woman has no experience in this matter.
Models with elastic bands for girls and women can be done on hair of any length. Before choosing a suitable styling for your image, you need to correlate it with your external data.
Here you need to have taste and moderation. The quality of the curls, the contours of the face, the shape of the ears and other nuances influence the choice.
For a long time, so-called rubber bands were used to fix hairstyles. Today, rubber bands are made from silicone.
The store sells two types of rubber bands:
- ordinary;
- spiral.
For little girls, it makes sense to stock up on products of both the first and second types. Silicone rubber bands come in a variety of colors. Unlike other accessories, they are completely harmless to hair.
They have the necessary elasticity and do not injure the strands during use. Rubber bands are indispensable when doing children's hairstyles. Ideal for any hair type.
How to choose rubber bands?
Hairstyles for long curls, for the most part, require some fixation.
For these purposes, cosmetics and special accessories are used, including silicone rubber bands.
Today, every hairdresser has in stock a set of rubber bands of different types and colors. Every woman who styles her hair with her own hands knows how to use elastic bands.

When choosing elastic bands for your own needs, you must take into account that medium hair very often has to be fixed in a certain position. Therefore, rubber bands must be selected according to thickness, color and price.
Quality products cost more, and they will last longer. It is advisable to have a varied color scheme. It is convenient to use transparent products.
You need to use elastic bands, put them on and take them off in such a way as not to harm your hair.
Hairstyles for long curls
For girls, a hairstyle with multi-colored elastic bands for long hair is easy to style on your own. You should stock up on rubber bands of the desired color and in sufficient quantities in advance.
The first condition that must be met when styling with elastic bands is that children's strands must be washed and dried. Then comb thoroughly without disturbing the structure.
In this case, the curls are gathered into a ponytail on the top of the head and secured with a thick colored elastic band. The tail should be divided into 6 or 8 strands and secured with elastic bands.
Each strand is divided into two parts and connected to the adjacent half. A circle is formed on the top of the head, which must be secured with bobby pins.
In modern conditions, elegant hairstyles are very often done at the last moment. The presented option is not intended for little girls.
Long curls should be combed, gathered into a loose ponytail at the back of the head and secured with an elastic band. You can leave loose strands along the temples, which are curled into large rings with a curling iron.
The hair above the elastic band is divided into two parts. And you need to pass the tail into the hole formed.
After that, you need to pull the elastic up a little and that’s it. The hairstyle is ready.

Quick bun
Many years of experience convincingly show that doing the same hairstyle every day quickly gets boring. In addition, long hair requires a lot of attention.
In order not to waste time styling a complex model, it is often enough to lay the curls in a bun and secure with an elastic band.
Curls should be gathered into a ponytail at the back of the head. Then divide them above the elastic band into two parts, and insert the tail into the resulting hole.
But not the whole thing, but only a part, so that a bunch is formed. This bunch needs to be secured with invisible pins.
"Cobweb" for girls
A children's spider web hairstyle using rubber bands is easy to style with your own hands and looks very impressive. It can be done for a holiday or for every day.
Plus, the hair in this model is securely fixed and does not interfere with the child’s activity in games. Hairstyle is not done quickly. It is important to maintain proportions and accuracy here.
The curls are divided into two parts by a circular parting. The upper part on the top of the head is fixed into a ponytail. And from the lower strands the braiding begins in the French style.
In this case, one of the three strands is taken from the tail. As a result of this weaving, a cobweb is formed.
Mesh model
Many children's hairstyles using elastic bands are made according to patterns that are used for various conditions.
When a “mesh” is made for a festive event, elastic bands of bright colors are used. For everyday use, modest shades are allowed.
Weaving this hairstyle begins by separating a strand in the front of the head, above the forehead. The hair is divided into thinner strands numbering 4 or 6.
Each strand is fixed with a colored silicone rubber band. Then two adjacent strands are divided in half and these halves are combined into a separate strand. This is how weaving is done.

Hairstyles for medium length strands
You can create a hairstyle using rubber bands for medium hair without much effort. The difficulty of installation is determined by the complexity of the model.
For everyday needs, just secure the ponytails with rubber bands and you can send your child to kindergarten.
When a hairstyle is being prepared for a special event, a more strict approach to hair styling is required.
One of the models that can be assembled using only rubber bands is called a “bun”. During the installation process, you will need two dozen silicone rubber bands and a donut.
Medium hair allows you to create almost any hairstyle that is presented by stylists for everyone to see. Children's models with a tail serve as a clear confirmation of this.
First, the hair is collected at the top of the head and secured with an elastic band into a ponytail. Then you need to step back five to eight centimeters from the base and secure the hair again with an elastic band, grabbing the strands from below.
And proceed in this way as long as the hair length allows. The result is a very cute hairstyle.

In the frantic rhythm of the metropolis, there is a catastrophic lack of time for a beautiful, original hairstyle, because most often such styling requires a lot of time, patience and effort.
However, modern fashionistas have found the ideal solution to this problem - hairstyles using simple hair bands. This method of transformation differs from others in its simplicity of execution and original appearance. Even an inexperienced beginner will be able to make a couple of interesting options on his own.
It is worth noting that the variety of models allows you to find a suitable look for both owners of straight, thick and thin hair. Girls with curly hair will not be left without attention; there are many interesting ideas for them too.
What rubber bands should I use and what else is needed?
A hairstyle with elastic bands is a great way to style your hair without complex and expensive accessories. For such hairstyles, you often only need a couple of products:
- small silicone rubber bands (preferably to match your hair color);
- comb (comb, backcombing brush, combination comb and with a sharp end);
- hair clips;
- invisible (it is better to choose thin ones);
- hairspray (any fixation).
Some fashionistas add elegant jewelry: tiaras, fresh flowers, bright scarves, silk scarves, hairpins decorated with beads or flowers.
- They are safe for hair. Unlike, for example, stationery or metal clips, which often cause the strands to become tangled when removed, silicone rubber bands do not tear the hair or tangle it. And thanks to its elasticity and soft structure, this type of elastic band does not put excessive pressure on the curls.
- Suitable for any hair: thick and thin, long and short, curly, brittle and unruly.
- There are many color options, so you can easily choose the right shade (there are also transparent copies).
- Such elastic bands hold the hair well, so the hairstyle will not fall apart, will not “slip”, and will be pleasing to the eye for a long time.
- They have affordable prices.
Do-it-yourself styling using rubber bands
High ponytail "Flashlight"
“Flashlight” is great for girls with long hair, regardless of the thickness of the strands. This ponytail is an ideal hairstyle for the office, business meeting, date or even going to a nightclub. So:
- Comb the strands thoroughly, then, using medium-diameter curlers or a curling iron, curl the hair along the entire length. This will make the tail look fuller.
- Gather your curls into a high ponytail and secure tightly with an elastic band.
- Cover the base of the ponytail with a thin strand of hair, “hide” the ends inside the ponytail and secure with a bobby pin.
- After that, pull the hair in the ponytail tightly with elastic bands along its length. Curled curls between two elastic bands form spectacular “lanterns”, and if their volume is insufficient, the curls can be lightly combed.
- When the lanterns are formed, spray your hair with hairspray.
We invite you to watch a video on how to create a “Lantern” hairstyle:
Tail braiding

This weaving looks elegant and solemn and goes well with evening dresses and formal suits. Suitable for both romantic people and business women. This weaving method is quite simple, the main thing is to follow the instructions:
- Comb your hair back, then gather a small ponytail of curls near your forehead, secure with an elastic band and tilt it forward so that it does not interfere with further work.
- Separate the next strands and make a ponytail again.
- After this, divide the upper ponytail into two equal parts and lower these strands down on both sides of the lower ponytail, and lift the lower ponytail up and, for convenience, harden it with a clip or crab hairpin.
- Separate the next area from the loose hair, add it to the lowered curls and tie another ponytail from this. Remove the clip from the pinned ponytail, which is now the top ponytail.
- Do these steps to the end of your head.
- When you run out of loose hair, you will end up with only two ponytails: top and bottom. Place the elastic on the upper ponytail, stepping back a little from the base, divide the resulting area between the two elastic bands in half with your hands and insert the lower ponytail through the hole. Continue this step until the end of your hair.
- Gently straighten the braid with your hands, starting from the top and holding subsequent links. To be sure, apply a little hairspray.
The hairstyle is popular among brides, because it can easily be decorated with magnificent accessories: fresh flowers, amazing wreaths, beads, stones, rhinestones, etc. It looks incredibly beautiful.
We invite you to watch a video about how tail weaving is done:
Mesh on loose curls

This model is a win-win option for a date or a walk in the park. The weaving looks elegant and sophisticated. So:
- Parting evenly, select a strand along the forehead (about three cm). For convenience, gather the rest of your hair into a ponytail or pin it with a clip.
- Divide the selected curls into several sections of equal thickness. The number of sections depends on the thickness of the hair - the thicker the hair, the more sections.
- From each section, using thin elastic bands, make a tail.
- Then, divide each section, except the far right and left, into two parts.
- After this, combine the two “adjacent” halves of the ponytails into one. This must be done with all curls. Also connect the extreme ponytails to the adjacent half. This will be the first row of weaving.
- Subsequent rows are created according to the same pattern. The number of rows depends on individual preferences and features.
- The rest of the hair remains loose.
The mesh looks best on straight hair. Curly and wavy strands must be straightened using curling irons before styling. Otherwise, the hair will become frizzy and the hairstyle will not look neat.
Laying of strands

This type of styling resembles a fishtail braid. Ideal for social events and other special occasions. This type can be afforded by a lady even with not too thick hair.
Instructions:
- Make a clear parting on the parietal area and highlight a wide strand on the right.
- Then, divide the strand into two equal parts, twist each of them towards the face into a tight strand. Now intertwine the two strands together.
- Add a small strand to the bottom strand. Twist the same strand into the top strand.
- In this way, twist tight strands to the back of your head.
- On the other side, do the same.
- After that, carefully add additional volume to the strands with your fingers, slightly stretching the upper curls. Be careful not to overdo it.
- Transfer the tourniquet from the left side to the right and secure with a silicone rubber band. And transfer the tourniquet from the right side to the left side and also secure with an elastic band.
- Cover the elastic bands with a loose strand and secure it with bobby pins. Spray your hair a little with hairspray.
In the form of bows

A hair bow looks playful and flirty; it will add charm to any look. To make a beautiful bow:
- Comb your hair thoroughly. Select a strand from the top of your head and gather it into a ponytail, securing it with a thin silicone elastic band.
- As you pull out the last loop of the elastic, leave some of your hair tucked into the ponytail to create a bun. If you want to make a large bow, then pull out the “bun” larger, and vice versa, if it is small, then the “bun” should be small.
- After this, pull the loop out of the elastic again and twist it.
- Make another loop from the ponytail (pull the loose curls through the loop). The resulting “bun” should be exactly the same size as the first one - this is necessary for the symmetry of the bow. Place them opposite each other. It is worth noting that the free ends of the tail should be in front.
- To create volume, carefully straighten both buns. Give a neat shape to the future bow.
- Now, collect the strand and wrap the resulting piece from front to back.
- Secure the ends at the back with bobby pins. The “middle” can be decorated with a beautiful hairpin, a fresh flower or a hairpin with a bead.
According to these instructions, you can create a large bow from all the hair or one small one in front, on the side. Two small bows opposite each other look beautiful.
We invite you to watch a video on how to create a hairstyle with a hair bow:
Weaving "Mermaid"

Another original and uncomplicated hairstyle for long hair is the “Little Mermaid” braid. By following the recommendations, you can easily create a gentle, feminine look.
- Take two strands of equal thickness from the temple area, make a ponytail out of them in the middle and secure it with an elastic band.
- Then, a little lower, take two more strands again and make the same ponytail.
- After this, twist the ponytails together three times.
- Tighten them, making the structure tighter and more secure.
- Now, to add volume, carefully pull out the strands.
- Repeat the above steps until all the curls are gathered together.
- Finally, spray your hair with hairspray.
Braids

Hair ties are also used for braiding hair.. Such models are suitable for those with thick and coarse hair who would like to remove heavy curls.
And for girls with thin and sparse hair, braids will help create additional volume. These could be:
- openwork braids;
- braid diagonally;
- volumetric models;
- spiral;
- fish tail;
- heart, etc.
Photo


Silicone rubber bands are a convenient, versatile device. to create simple and at the same time original hairstyles. But to make the process of creating the perfect image as easy as possible, it’s worth remembering a few points:
- You need to prepare everything you need in advance. This will make the process easier and allow you to focus on what is most important - your hair.
- Experts recommend using several mirrors so you can carefully examine your masterpiece from all angles.
- It is better to do any styling on clean hair, but if it is very crumbly, then the curls can be sprayed with spray or hairspray.
- Do not style your hair on wet or poorly dried hair, as this will negatively affect its structure.
- Try to use only high-quality products, this will avoid minor troubles.
Cheap silicone rubber bands can break while creating a hairstyle, low-quality bobby pins can scratch the scalp, etc.
Who will it be suitable for and in what cases will it be appropriate?
A huge variety of options allows you to choose the perfect hairstyle for every girl, regardless of age, physique or social status.
Hairstyles with elastic bands look quite elegant and sophisticated even on adult girls, so they would be appropriate for a business meeting, a social event or an ordinary trip to the cinema.
There are generally accepted recommendations that will help you make the right choice. Depending on the shape of the face, the width of the forehead, and the structure of the auricle, it is worth choosing exactly the type of hairstyle that will help emphasize the advantages and hide the disadvantages:
A hair tie is a universal accessory for creating an extraordinary hairstyle.. A couple of these gadgets can transform a simple, boring look into a stunning and fashionable one. The main thing is to show a little imagination and patience.
Hairstyles with elastic bands for medium hair look very beautiful on any person. And no matter how old you are, you can do it for both children and adults. The main advantage of this hairstyle is that it is absolutely harmless to the hair and is not inferior in beauty to other hairstyles. In fact, there are a lot of options for such hairstyles. They can be used for any important events, business meetings, everyday use and even for a wedding. In addition, for hairstyles, the length does not matter whether the hair is medium or long. Below we present you several options for creating hairstyles with elastic bands for medium hair. Hairstyles are created using small silicone rubber bands, combs and hairpins.
Hairstyles with elastic bands for medium hair video:
Hair styling with elastic bands
This is a modest and elegant hairstyle. You can do it yourself using rubber bands. Can be worn not only every day, but used as an evening option. You will need:
- Comb
- Rubber bands
- Invisible
First, select a small part of the hair on the left and connect the same part on the right and tie the tail with an elastic band. We also select the lower left part and the right part and tie it with an elastic band. The strands should be medium, the effect will be much better than from large or very small ones. Next, we lift the lower tail above the upper one and insert it into it. Let's take the tail, which is located below, begin to pull out the strands to make it seem more voluminous, repeat the work on the right. We do the same until we run out of hair at the back of the head. We tie it at the end with rubber bands. We bend the remaining tail inward and pin it with hairpins. Can be used as an option for work, if for an evening event, it should be decorated with a decorative hairpin or flowers. At the end, spray with hairspray. Today, wedding hair clips and jewelry are very popular (see more details about wedding hair piece).


Braid with rubber bands
To begin with, carefully comb your hair, then separate a small part of the hair at the crown and tie it with a silicone elastic band. Now we lift this strand up and secure it with a clip so that it does not interfere. After that, we do the same, separating the lower part. Let's take the top one, divide it into two parts, lowering it onto the lower tail, meanwhile the lower one should be sent to the top and also pinned with a clip. We connect our two strands with an elastic band, and now we lower the upper tail, dividing it into two parts. And so, I gradually lift it, dividing and connecting, until you run out of hair. At the end, connect the hair with a hairpin and fluff the braid, pulling out strands one by one. After adding airiness, fix with varnish. Using the same principle, you can make two beautiful lush braids. To do this, you need to part your hair.


Wedding hairstyle with elastic bands
We comb the hair and separate it from one side and the other along the middle strand, connecting it into a ponytail. From the hair located under the tail on the left, select a strand and twist it through the tail. And we repeat this 3 times. Then we do the same on the right side. Let's fluff the strands a little to give a little lightness and volume to the hairstyle. Then we make such a ponytail from below and alternately tighten 3 strands into it on both sides. We continue until we run out of hair. If you need extra volume, use a comb to pull it out. Now spray with hairspray and give the hair the correct shape using a clip. Leave it in this position for a couple of minutes, sprinkle it a little more with hairspray, and when you remove it, you will see that the hair has repeated the shape of the hairpins. Re-spray your hair.
Wedding hairstyle video lesson


Hairstyle with elastic bands for medium hair - "Mermaid"
As usual, we separate the strands from both sides and connect them into a ponytail. Then we make the same tail below the first one. Then we twist them together 3 times, getting a flagellum. We tighten the elastic bands at the base, unravel the flagella to create volume. We leave these tails, create new ones, twist them together, as close as possible, pulling the tails towards each other. We continue until we run out of hair. At the end, fix the result with varnish.
Video tutorial on "Mermaid" hairstyle
Photo


Bows
We connect the tail on both sides, twist it and tighten it, then add lightness. We also pull out the top hair to create additional volume . Once again twisting the tail, you should get a bow. We secure it at the bottom with an elastic band. We take the lower parts of the hair and also tie it, twist it, add lightness to the hairstyle, twist it a second time, getting a bow and fixing it with an elastic band. Thus, we make the last bow, and tie the rest of the hair into a ponytail, and leave it. At the end, we coat the hair with hairspray.
Video tutorial on hairstyles with elastic bands "Bows"
Photo

Do you want a stylish hairstyle, but haven’t learned anything other than a ponytail and braids? Very quick and simple hairstyles with elastic bands will easily solve the problem, because anyone can do them!
Volume hairstyle for long hair
This beautiful hairstyle is ideal for holidays and celebrations. It's very easy to make - you only need a few accessories.
1. Gently comb and part your hair. Take thin strands of hair from each side. Select the exact same strand in the center.
2. Tie these strands into a ponytail.
3. Make a hole in the central section with your finger (slightly above the elastic) and thread the strands through it.
4. Stretch the weave with your hands to make it fluffy.

5. A little lower, select two more of the same strands. Connect them to the tail and tie them again.
6. Stretch the weave, covering the junction.

7. Continue as long as length allows. The result will be a very beautiful holiday hairstyle.

By the way, you can wear the same hairstyle every day. In the everyday version, it is made tighter without stretching the strands. In all other respects, installation is performed in exactly the same way.

Hairstyle for loose strands
Long hair gets in the way and gets into your eyes. They can be easily assembled into a cute style.
- Comb it all back.
- Separate one thin strand on the sides.
- Connect them with an elastic band, placing it on the side.
- A little lower, separate two more thin strands.
- Connect them again - approximately in the ear area.
- Continue braiding up to neck level. The elastic bands can be anything – bright or matching the color of your hair.

Greek hairstyle with headband
A hairstyle with an elastic band around the head can be done in 10 minutes, but it will make you happy all day long! With her you will not be left without the attention of others.
- Wear a stylish headband, lowering it almost to your forehead.
- Tuck the strands on the sides under the bandage.
- Braid the remaining hair into a fishtail.
- The end needs to be tied.

fishtail
Do you like fishtail? It can also be created with accessories!
1. Comb it all back.
2. Separate two strands of medium width at the edges. Tie them in the middle without tightening the elastic.

3. For the next ponytail, take two more strands and tie them in the same way.
4. Throw the second tail up and turn it through the first. Be very careful not to get your hands caught in the rest of your hair.

5. Connect the next pair of strands together again and thread them through the elastic that tied the first ponytail. In this case, you need to lower it a little.


6. At each stage, the braids interlock the outer strands and turn them out through the first ponytail. To increase the length of the braid, the elastic band is gradually pulled down. Do this carefully so as not to tear it.

7. At the very last stage, do not turn the strands out, but chop them in front.

8. Decorate the tip with a hairpin, ribbon or flower.


Tips to help you create a beautiful and fashionable hairstyle from rubber bands in five minutes:
Reverse braid
The now fashionable reverse braid can be easily braided using simple elastic bands.
- Comb it all back.
- At the top of your head, separate a small section of hair and connect it.
- A little lower, separate the exact same strand and tie them again.
- Divide the hair in the first ponytail in half and pass it under the second. Tie it up.
- Separate the strands again and connect them.
- Divide the hair in the second ponytail in half and pass it under the third, securing it with an elastic band.
- Continue braiding until the end of your hair. The braid can be braided either in the center or diagonally.

Office ponytail made of rubber bands
This strict hairstyle for long and medium hair is ideal for going to work, relaxing or walking.
1. Tie a smooth ponytail, positioning it higher.
2. Take a separate strand and wrap the elastic around it. Hide the tip in your hair, securing it with a bobby pin.
3. Step back a little lower (10-15 cm) and tie a silicone elastic band on the tail (choose to match your hair color).

4. Make an inverted tail.

5. Step back the same distance again, tie an elastic band and make an inverted ponytail.
6. If the length allows, make a couple more of these loops.

Romantic styling
How to create a hairstyle that is suitable for parties and dates, weddings or proms? The instructions will help you!
- Comb it all back.
- Gather the upper part of the hair at the top of the head.
- Select two middle strands of hair a little lower.
- Link them together.
- A little lower, select two more of the same strands and connect them.
- Decorate your hair with beautiful hairpins.

Laying of strands with tails
This stylish hairstyle with scrunchies looks simply luxurious! It can be safely done not only for every day, but also for a special occasion.
- Separate two thin strands of hair near your ears.
- Twist them into light ropes.
- Link them together.
- A little lower, separate two more thin strands of hair. Also twist them into ropes and tie them in the middle.
- Repeat 5-6 times.
- Curl the ends of your hair.

Tail flashlight
This simple hairstyle will bring a newness to your look and make you look very bright.
- Comb it all back or part it.
- Tie a tight ponytail around the back of your head.
- Tie another elastic band a little lower to match your hair color.
- Stretch the strands with your hands so that the flashlight comes out.
- Step back the same distance and tie another accessory.
- Stretch the strands again.
- Continue along the entire length.

How do you like this option?
Evening hairstyle in Greek style
Evening hairstyles with a headband with an elastic band are in great demand, because they look incredible and can be safely combined with any type of outfit.
1. Place the headband over your hair, leaving your bangs and strands hanging freely at your temples.

3. Using the thin tip of a comb, create volume at the back of your head by carefully sliding it under your hair and gently pulling it up.
4. Twist the loose strands at the back into tight strands and tuck them under the bandage. Secure your hair with hairpins.


Air bubbles
1. Comb it all back.
2. Separate the strand from the side near the forehead.
3. Tie the strand with an elastic band, wrapping it twice.

4. Stretch the elastic with your finger, lower it a little lower, twist it and make two more turns with it.
5. Stretch the hair on both sides or in a checkerboard pattern.

6. Repeat the procedure on this strand of hair, but with a different accessory.
7. Use the same technique to style the rest of your hair. The size of the strands can be increased to create a wave effect.
8. Lay all the air loops in random order, securing them with pins. Decorate your hair with hairpins.

fairy tail
This adorable hairstyle isn't just for kids. It looks just as beautiful on older girls.
- Tie a high ponytail.
- Separate two thin strands of hair from the sides.
- Tie them and gently stretch them.
- Select two more thin strands a little lower.
- Tie them and stretch them a little.
- Continue braiding until the end of the ponytail.

Three perky tails
With such a playful hairstyle you can go to work, a date, or a party.
- Comb it all back.
- Gather the top part of your hair and tie it at the top of your head.
- Turn it outward, passing it through the elastic band.
- Below, form two more tails. Turn them inside out.
- Gently stretch the weave sections with your hands.

The most common accessory for children's hairstyles are ordinary elastic bands. They are sold everywhere, are inexpensive, but at the same time they differ in color, style, and even material. With just one elastic band you can quickly and easily create a cute and comfortable hairstyle.

Who are they suitable for?
Hairstyles with various elastic bands are, of course, for children, suitable for girls from a young age until approximately the end of primary school. At an older age, this accessory may look undignified, and the girls themselves begin to strive for something more laconic or simply switch to loose hair.


Choosing based on hair length
Long hair is still more common among girls who adore colored elastic bands. Having a head of hair allows you to create a variety of hairstyles, from ordinary ponytails to complex braids.
Ponytails, braids and buns are suitable for every day, but for the holidays it is recommended to make voluminous weaves, plaits, shells, and other complex designs.


For example it could be a regular ponytail, to which a braid at the top adds variety. First, a regular ponytail is formed on the top of the head and secured with a bright and beautiful elastic band. On the right side, a thin strand is separated, which is divided into three parts. Weaving a classic braid begins from this hair, when the outer parts are placed on the central one. Having made a single weave, you should separate another strand on the right and add it to the central part. You need to repeat the algorithm with the hair on the left. Having reached the required length, the braid must be tightened with an elastic band.


The little fashionista will definitely like it colorful rubber band, which, by the way, is done in just ten minutes. All hair is separated by a longitudinal parting, after which each section is divided crosswise. The resulting four parts are again divided horizontally, after which you should get eight equal strands. Each of them transforms into a ponytail, secured with rubber bands of the same color. Finally, all the tails, arranged in a circle, are gathered into a single ponytail at the top of the head, thereby forming a wreath.
By the way, there can be more individual tails on the “circumference” - up to 16.


Another unusual solution would be creating two hearts, especially if the girl’s hair is thick and long. The entire mass is divided by parting into two identical parts and each is transformed into a tail. Then loops are made on each side at the base through which the ends of the hair are pulled. Having pulled out this part, it must be divided into two parts, each of which must be twisted into a flagellum. Having turned two strands into a heart, it must be secured with convenient accessories.
For beauty, the finished hairstyle is decorated with two elastic bands with bows.


Another very simple hairstyle is also suitable for medium length hair. First of all, combed hair is separated using a side parting. Next, six strands are taken at the top, which are tightened with the help of colored accessories. Approximately in the middle part of each strand, knots are tied directly from the hair. After this, all the hair is collected in a ponytail, bun, or left loose.


Short hair creates some limitations for hairstyles, but suitable options still exist. The classic solution, of course, is a variety of ponytails. It is better for a young schoolgirl to collect one or two ponytails, but for little ones you can make several. This hairstyle not only allows you to quickly tidy up your hair, but also, if necessary, tame stray bangs. To collect several ponytails, just divide all the hair into equal strands and then secure them with elastic bands.


The number of them can be chosen, but usually a pair is collected on the top of the head, then the second is located a little lower, and the last pair is at the level of the bottom of the ears. The resulting tails can be intertwined and also twisted. They are also often interestingly complemented with braided bangs.


A variation of the usual ponytail is the “malvinka”, when only the upper part of the strand is fixed with an elastic band. It is suitable even for the shortest hair lengths, allows you to tame bangs and looks very beautiful.
To collect it, just comb your hair well and highlight the parietal part, which is then secured with accessories.

This hairstyle with ponytails gives you the opportunity to experiment with the elastic bands themselves. They can be ordinary colored, with flowers, bows, insects and other images. By the way, it is recommended to take braided elastic bands, which will not get tangled in the hair, and therefore cause problems with further detangling.
The situation with bangs should be mentioned separately. If at home a mother is able to periodically straighten her daughter’s bangs and make sure that they do not interfere with her reading or playing, then in kindergarten or elementary school no one will monitor this due to the large number of children and only one specialist. Therefore, when choosing a hairstyle with elastic bands, it is recommended to give preference to those that take into account the fixation of the bangs.


Beautiful options
Hairstyles for girls for every day with elastic bands should be created taking into account several conditions. They should be easy to install and take a minimum amount of time to create. The hairstyle should be secure, not fall apart at the slightest activity, but at the same time not pull the hair and not cause discomfort. It is important that complex braids or ponytails do not interfere with the girl’s business, for example, studying, and also do not interfere, which is very important in a situation with long, unstyled bangs. An important requirement is the ability to “survive” changing clothes - that is, not to lose one’s shape or to immediately recover after removing or putting on a hat or other clothing.
Finally, it is important that the chosen hairstyle pleases not only the mother, but also the child. For example, girls usually love very simple looks with bright elastic bands, ideas for which are given below.


"Chess"
The complex-sounding “checkerboard” hairstyle is actually very easy to implement if you follow the instructions step by step.
Its huge advantage is the fact that it is suitable even for the shortest hair.
First of all, a rectangle of hair is evenly separated from one side of the head. The remaining strands can be secured with an elastic band while braiding, because they will not be needed until the end of the process. The hair located at the temple is divided into three identical rectangles and pulled into ponytails.


The next hair line is divided into two rectangles. They are also secured into ponytails so that at the same time you can grab the ponytails from the first line under the elastic band. The tail from the first line, which is located in the middle, is divided in half at this time.


The bottom line of hair is again divided into three rectangles and transformed into ponytails, and the ponytails from the second line are woven into them, dividing into two parts.


Loose curls from the bottom line are combined into a single ponytail with the hair that was pulled to the side at the very beginning.


Fixation at each stage is carried out using multi-colored rubber bands, single-colored or simply harmonizing.
"Dragon"
Little girls will definitely appreciate the dragon hairstyle with ponytails secured with beautiful elastic bands.
The bangs or part of the hair at the front are gathered into a ponytail.
Next, curls are added to them from the sides, which are taken a little lower, and everything is again secured with an elastic band. Another row is made approximately in the middle of the head in a similar way - strands are taken from the sides, attached to the tail and tightened with an accessory. This algorithm should be continued until all the hair is gathered in one elastic band and forms a low ponytail.

On the back of the head
Many interesting hairstyles with colored bands are done at the back of the head, which allows you to create an effective “picture” at the back. First of all, a part of the hair is carefully separated from the back, which is transformed into two small ponytails, placed one above the other. Then their ends are crossed, connected to a new batch of hair, after which two more of the same tails appear nearby. Having “filled” the entire back of the head with crosses, the remaining hair can be twisted into a neat bun or finished with a regular side ponytail.


With braids
There are a huge number of variations of hairstyles with braids. The embodiment of one of them begins with the fact that two low ponytails are made on the sides, which are then braided into classic three-row braids. Using an elastic band, the left braid is transformed into a ring that holds its shape. By the way, it is not necessary to hide the ends; they should stick out freely on the sides. Then the right braid is threaded through the “steering wheel”, then returns to the beginning of the tail and is secured with the existing elastic band.
The ends of the strands should also stick out evenly. You can decorate your finished hairstyle with a variety of hairpins, elastic bands and bows. If desired, even before weaving begins, for greater originality, the straight parting should be replaced with a zigzag one.


For the holiday, your daughter should braid an elegant bun of braids.
First, the hair is combed to the side, forming a neat parting, and tied into a low ponytail. Dividing the total mass into five or six parts, each one must be shaped into a regular braid. The ends of the resulting weaves are folded together and secured with a thin elastic band.
Then they are folded in half and secured with a more durable accessory. You can decorate such a bun with a fabric elastic band or a regular one, but decorated with a large flower or decorative element.


For everyday wear, a variation of the “fishtail” is suitable, which can be done with any hair length. Having divided the total mass into two parts, it is necessary to separate small identical curls from the sides. They are connected at the back with a beautiful elastic band, which then lowers slightly, and the ends are threaded through a loop. The same should be done with the rest of the strands. You can process all the curls this way or limit yourself to the number of weaves you want.


"Basket"
At home, after practicing a couple of times, you can learn how to make various variations of the exquisite “basket” hairstyle. In the first case, the process begins with the distribution of hair over the entire circumference of the head. Next, starting right at the top of the head, circular weaving begins. It is more convenient to implement it by adhering to the technique for a French braid, weaving in additional strands only from the outside. The work goes in a circle until all the strands are used.
Read also...
- Russian Buddhists celebrate the New Year according to the lunar calendar. When is the Sagaalgan holiday?
- Big Kinder Surprise with your own hands How to make a Kinder surprise from chocolate
- How to give yourself a short haircut
- Original hairstyles with elastic bands for girls Easy hairstyles with small elastic bands