Kanzashi flowers made from satin ribbons. Kanzashi master class, kanzashi flowers, kanzashi flower, do-it-yourself kanzashi, kanzashi made from ribbons. How to make kanzashi flowers
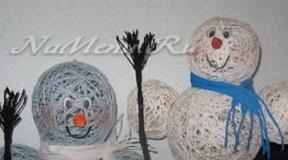
Such wonderful hairpins with kanzashi flowers look elegant and noble at the same time. The product perfectly combines white and dark blue satin ribbon, as well as gold brocade.
The unusual ensemble is complemented by a transparent crystal in the form of a center inserted into a hug-lily. The above hairpins are quite likely to become a decoration for a young schoolgirl, because there is nothing bright about them, and the blue and white color scheme echoes the strict school uniform. To complete the suggested pair of accessories for an elegant hairstyle, prepare the accessories indicated below and follow the kanzashi lesson. In it I want to present kanzashi for beginners, a step-by-step photo lesson.
For one hairpin we need:
- 7 pieces of satin ribbon in dark blue and white colors, gold brocade - square shape 5*5 cm;
- 7 pieces each of white satin ribbon and gold brocade - square shape 4*4 cm;
- Golden jug hugger – 1 copy;
- Transparent half bead crystal – 1 copy with a diameter of 1 cm;
- White felt base with a diameter of 4 cm - 1 circle;
- A piece of stretch bias tape – approximately 4 cm long;
- Metal clip 5.5 cm.
To make the same elegant hairpins, you need to simulate two types of sharp kanzashi petals: double and triple. Double parts will be made of ribbon and brocade in the form of squares with a side of 4 cm, triple parts will be made of ribbon and brocade in the form of squares with a side of 5 cm. Craftswomen who make floral accessories from satin and other types of fabric also always need scissors, a ruler, and a lighter , thread with a needle and a glue gun.
Decorating kanzashi step by step
1. Take squares of three varieties of larger size 5 cm. Each of the 7 pieces needs to be modeled with the others to get three-layer sharp kanzashi petals. After cutting the ribbon, be sure to singe the sections to remove any protruding threads.
2. Bend each square so that you get a quarter of the original piece - a triangle folded in four.

3. Assemble a multi-layer “sandwich”: place a gold triangle on the blue triangle, and a white triangle on the gold triangle. From a multi-layer blank, model a beautiful rounded petal with a sharp tip. To do this, use your fingers to close the sharp corners in the resulting structure so that the blue layer remains on the outside and the white layer on the inside. Holding the workpiece in this position, carefully cut off the closed corners and singe, while pressing down so that the satin sticks together. Also cut off the lower part, giving it a flatter shape.

4. Make 7 blue-gold-white petals according to the presented method. Attach the flower to a thread. And such a product can already claim to become an elegant hair clip. But in this case, additional fragments will be executed.

5. Prepare white satin and golden brocade squares of ribbon with a side of 4 cm. Burn the edges.

6. Bend squares of this size in the same way into four-layer triangles. Then combine the white ribbon and gold, leaving a white layer on the outside.

7. Close the ends, give the desired shape by singeing and cutting off all excess. In this case, a two-layer petal will be made.

8. Make 7 decoration pieces.

9. Glue a rich crystal to the previously made main flower, inserting it into the water lily.

10. Prepare 7 smaller petals for additional decoration.

11. Glue the resulting white and gold parts into the recesses, complementing the three-layer fragments of the central flower.
12. When the beautiful kanzashi product is ready, you need to turn it into a hair clip. A great way is to make the base removable. Cut out a felt circle and cut two slits about 2cm apart. Cut a piece of white tape (thick elastic), then pull the ends of the elastic through the slots. Glue the ends from the inside out. Turning the circle to the other side, you will see that you have a convenient loop into which you can insert a clip or hoop.

13. Glue felt and elastic to the back of the flower.
14. Pull the top of the clip under the binding.

If you need to make a second hairpin, prepare another portion of the fittings and repeat all the steps. Any novice master can do all the work, I presented a step-by-step master class, we got such an elegant hairpin, I present the photo below. It can become an original gift for a girl; it can be used for any occasion, for example, kanzashi for the last call.

In this material we presented 6 step-by-step master classes for beginners, following which you can make flowers from ribbons for making/decorating with your own hands:
- Artificial flowers (interior);
- Wall panels;
- Topiaryev;
- Decorative and wedding bouquets;
- Costume jewelry (rings, brooches, necklaces, bracelets);
- Hair accessories (headbands, headbands, barrettes, elastic bands);
- Boutonniere;
- Gift packaging;
- Decorative pillows;
- Boxes for jewelry and other small items;
- Albums and notebooks;
- Applications for clothes, bags and shoes;
- ...and much more! This selection of photos shows only a small part of the crafts that you can make after mastering various techniques for making flowers from ribbons:

In addition to step-by-step instructions, you will find 30 photo ideas for inspiration, as well as a useful selection of videos.
Master class 1. Twisted rose from a solid ribbon
Let's start with, perhaps, the simplest and fairly quick way to make roses from ribbons with your own hands. Once you master the technique of rolling roses from ribbon, you can make them while sitting in front of the TV. Depending on the width and length of the ribbon used, you can twist both small and lush buds. You can use a ribbon made of any material - organza, satin, cotton and even strips of linen fabric.

What you will need:
- Any ribbon - the longer and wider it is, the larger the bud will be. For a medium-sized rose, a 2.5 cm wide ribbon is enough.
- Thread and needle or hot glue gun.
- Scissors.
How to twist a rose from a ribbon:
Step 1. Straighten and place the tape in front of you, then bend one of the ends of the tape (either) along the bias, as shown in Fig. 1.

Step 2. Wrap the tip of the ribbon into a roll in two or three turns to form the core of the rose, fix its lower part with glue or simply sew it (see Fig. 2).
Step 3. Now we begin to form the rose petals. To do this, bend the tape again obliquely to the outer side (see Fig. 3) and wrap it around the core of the rose, holding (and, if desired, fixing with thread/glue) the entire workpiece from below (see Fig. 4).
Step 4. Next, continue to “build up” the layers of “petals” according to the scheme: bend the ribbon outward - wrap the bud - bend the ribbon outward - wrap the bud, etc. (see Fig. 5). Periodically fix the layers of tape at the base of the bud with glue or thread and a needle. Remember that the most important thing is not to let the ribbon unravel.
- Experienced decorators can twist a rose by fixing the layers of tape only a couple of times (at the beginning and at the end), but for beginners it is easier to stitch/glue the “petals” of a rose much more often.
- It is more convenient to roll a rose by holding the base of the bud between your index and middle fingers, so that the flower seems to be lying in your palm.
Step 5. When the rose reaches the desired size, press the end of the ribbon to the base and tie/glue (Fig. 6).
- Practice curling roses from ribbons of different widths and lengths, experiment with the angle of the ribbon, the number of folds per layer, or the tightness of the twist to achieve the effect you like best. So, for example, a rose twisted from ribbon can be very multi-layered or, conversely, softer, have sharper corners or, conversely, rounded.
If you have any questions, we suggest watching a video on how to make a flower from a satin ribbon with your own hands using this technique.
Master class 2. Realistic flowers from ribbons (peonies, roses or ranunculus)
Now we suggest you familiarize yourself with the technique, following which you can achieve the most realistic and elegant look of petals, which is only possible for flowers made by yourself. Take a look at this selection of photos and see for yourself.

Despite all the beauty and apparent complexity, even a beginner can make such flowers from ribbons with his own hands.
You will need:
- Candle or lighter.
- Ribbon 5 cm wide (for a medium peony) made of 100% polyester (it can be either rayon/satin or organza). Keep in mind that ribbons made from natural materials will not work. If you want to make a large and lush peony, then you can use either more petals and/or a ribbon 7-8 cm wide.
- Scissors.
- Needle and thread to match the ribbon.
How to make a peony with your own hands:
Step 1. Cut the ribbon into squares in the following sizes and numbers:
- 5×7 cm (6-10 pcs);
- 4×6 cm (6-10 pcs);
- 3×5 cm (6-10 pcs);
- 2×4 cm (6-10 pcs).
As a result, you should have a minimum of 24 and a maximum of 40 squares. The more petals you make, the more magnificent and larger the bud will be.
Step 2: Now arrange the groups of squares into piles. Then cut out petals from each stack (the shape is shown in the picture below). Keep in mind that accuracy is not important here, everything can be done by eye, without measurements and without using templates. The main thing is that you get petals of different sizes: very large - large - medium - small.

Step 3. It's time for the fun part - giving shape and volume to our petals. To do this, light a candle or lighter and, holding the edges of the petal at a distance of about 2 cm from the fire, melt them (but do not scorch them!). Rotate the petal smoothly but quickly. This way you need to process all your workpieces.
- If you want the petal to become more rounded, hold it over the fire a little longer, but do not reduce the distance from the fire. However, sometimes petals slightly blackened by fire look quite organic.


Step 4. Take one of the smallest petals, roll it into a roll and make a couple of stitches in its lower part to secure it. You now have the core of your flower.

Step 5. Attach the second small petal and secure it with a couple of stitches. Continue attaching the petals one after another, maintaining a checkerboard pattern. When you are done with the small petals, start attaching the middle petals, then the larger ones, and finally the largest ones.


Flowers made from ribbons in two shades

Flowers made from ribbons of the same shade
Well, that's all, the peony is ready!


Using the same principle, but by changing the number, shape, size and color of the petals, as well as adding stamens from beads or floss threads, you can create roses, tulips, poppies or ranunculus.

Following our master class, you can make flowers not only from satin ribbons, but also from organza. Why not use old ribbons for baby bows?
Master class 3. Simple flowers from ribbons in 5 minutes
If you need to make flowers from ribbons with your own hands as quickly as possible, for example, for gift wrapping, then this step-by-step instruction will help you out.

What you will need:
- Any tape;
- Beads;
- Scissors;
- Hot glue gun.
How to make a flower from a ribbon:
Step 1. Cut out a small circle with a diameter of about 5 cm from cardboard or thick paper. This circle will become the base of your flower and will be hidden under the petals, so it does not need to be cut out carefully.
Step 2. Start gluing the tape to the top edge of the circle, creating a pleat as shown in the photo below.

Step 3: Continue applying the tape in a spiral pattern in 3 or more layers. When you reach the center, cut off the excess tape, fold the end under, and carefully glue it in place.

Step 4: Place a large dot of hot glue in the center of the flower and quickly fill it with beads.

Master class 4. Small textured flower made from wave braid
If you want to decorate a ring, headband, brooch or necklace with a flower, then a rose made from wave braid is best suited. After all, it turns out so neat, strong, elegant and small.

What you will need:
- A wave braid of medium width and a length of 50-60 cm (for one rose) or two ribbons of different colors of the same width, 25-30 cm long (if you want to make a two-color rose). However, the length can be longer or shorter, it depends on what size you want to make the bud.
- Scissors.
- Sewing machine.
- Threads with a needle to match the braid.
Step 1. Take two wave braids of the same length and intertwine them together as shown in the photo. Before you start weaving, secure the two ribbons with some kind of clamp so that they do not unravel.

Step 2: Machine stitch along the edge of your piece to secure the weave.

If you don't have a machine, it doesn't matter. Just run large stitches along the entire length of the braid.

Step 3. To make the flower, simply start folding the ribbon at one end, securing the layers with hot glue in some places.

Step 4: When you're done, you should have a bud that looks something like this. Simply tuck the remaining end of the braid under the flower and secure it with glue.

Step 5. Glue a small circle of felt, cardboard or thick fabric to the base. In the future, you can glue anything to this base - from a hairpin to a ring.
Step 6. Have you noticed that all the petals of our flower are closed? In this form, it looks more like a peony or ranunculus. If you want the flower to become a rose, simply spread each petal outward one by one.

Master class 5. Poinsettia with leaves
It's time to tell you how to make poinsettias from ribbons, which can be used to decorate anything, for example, an autumn wreath as in the photo below.

What you will need:
- Ribbon 4-6 cm wide in red, cream or any other desired shade;
- Green ribbon (for leaves) 2-3 cm wide;
- Scissors;
- A needle and thread to match the ribbon for the petals or thin copper wire (jewelry);
- Beads;
- Hot glue.
How to make a poinsettia from ribbons:
Step 1. Cut three pieces of equal length from the ribbon. How long should the segments be? It depends on what size flower you need. If you want to make a flower with a diameter of 12 cm, then the segments should be exactly this length.
Step 2. Give the resulting rectangles a diamond shape. You can do this in the following way: stack the pieces on top of each other, fold the stack in half, then give the resulting square a triangle shape by cutting off the excess on the sides. Voila, you've got diamonds!
Step 3. Pinch each diamond in the middle and tie the folds with thread (you can do a couple of stitches) or jewelry wire.
Step 4. Place all three pieces next to each other, then tie them with thread or jewelry wire to create a flower. Adjust the petals if necessary.

Step 5. Glue several stamen beads into the center of the flower.
Step 6. Now let's work on the leaves. Cut two lengths of 6-9 cm from the green ribbon (the length of the pieces should be approximately three times the width of your green ribbon). Place one of the rectangles on the table, wrong side up. Bend its right side downwards along the bias so that the workpiece takes on an L-shape (see photo). Now fold your letter G in half to create a house-shaped piece with a roof. Gather the bottom of the “house” with a couple of stitches or glue.

Step 7. Now the leaves can be glued/sewn to the back of the poinsettia, to a felt round base (if you have one) or directly to a decorative object (headband, pillow, etc.).
Master class 6. Lace ribbon flower
And finally, we present another express method for making a simple but beautiful flower with your own hands. The principle of operation in this technique is similar to that described in MK No. 3, but instead of glue, a thread with a needle is used to fix the craft, and instead of a satin ribbon, a lace ribbon is used. However, you can use any other one. Lace flowers make wonderful brooches and hair clips.


What you will need:
- Lace ribbon;
- Scissors;
- Needle and thread to match the ribbon;
- Beads;
- Hot glue.
How to make a lace flower:
Step 1: Baste the tape along the bottom edge using wide stitches.

Step 2. Once you are done sewing, gather the ribbon by pulling the thread and bring the two ends together to complete the circle and create the first layer of petals.


Step 3. Glue a small circle of felt or other fabric in the center on the wrong side of the flower. Sew the necessary accessories to it, for example, a pin, to make a brooch.
Step 4. Glue beads, rhinestones, stones or other decor to the center.

If you want to continue your acquaintance with the art of making flowers from ribbons with your own hands, we offer you to watch the following step-by-step video instructions.
In this video, you will learn how to make kanzashi flowers from 2.5 cm ribbon.
This video shows a method for making a rose from a satin ribbon, which differs from our master class No. 1.
Here is another master class on making roses in shabby chic style.
The topic of today's master class: kanzashi for beginners. Among the Internet you can find many interesting works using the Tsumami Kanzashi technique and it is not surprising that many people want to try to master this technique. What can be made using this technique: all kinds of hair decorations (elastic bands, barrettes, hairpins, hoops, headbands), topiaries, wedding bouquets, brooches, magnets, Christmas tree decorations, necklaces, curtain holders, etc. You can continue ad infinitum.
Where to start getting acquainted with new technology?
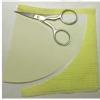
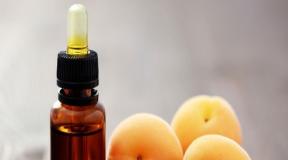
- To begin with, you should get the materials: a satin ribbon, a lighter or candle, a needle and thread, a base for crafts, a glue gun with rods and a beautiful center for a flower (half bead, rhinestones, etc.), scissors.
- For beginners, I would recommend using a ribbon 5 cm wide. For the simplest flower of 6 petals you will need 30 centimeters of ribbon, for a two-color flower - 2 types of ribbon of 30 centimeters each.
- What to choose: a lighter or a candle is up to you, it’s very individual. It’s worth trying both options, and then you yourself will understand which one is more convenient for you.
- The glue can be replaced with a crystal, its advantage is that it is resistant to heat and the product does not deform in the sun. However, most often they use a glue gun because of its better price (it is more economical) and ease of use.
- For those who don’t have a beautiful center for a flower on hand, you can make one from beads or cover a button with ribbon.
kanzashi for beginners (how to make a flower):
- To make a flower, cut ribbon squares measuring 5 by 5, in the amount of 6 pieces.
- Prepare the petals of the chosen shape.
- We collect the finished petals on a thread and connect them, or glue the petals with glue and assemble them into a flower.
- Glue the finished flower to the base and decorate the middle.
And here is the purchased base for the elastic:
The principle of operation is clear, so I suggest focusing on the most important thing - the basic petals.
Spicy Kanzashi Petal:
Fold the 5 by 5 square in half diagonally, fold it in half in the middle.
Fold it in the middle again:
We trim the corner a little and singe it.
We cut the edges almost parallel to the fold lines of the petal and singe them separately. At this point the sharp petal is ready.
Back view:
Flower of sharp petals:
Second version of the sharp petal:
All stages of the work are performed in exactly the same way, only at the end we singe the edges not separately, but together, and the result is a petal like this:
And if you turn out the edges of the petal, you will get this sharp, inverted petal:
An example of a flower made from sharp inverted petals + master class can be viewed.
Double sharp kanzashi petal:
The principle is the same as in making a single petal, only two colors of tape are used:
Example of using a petal:
Round kanzashi petal:
We fold a 5 by 5 square of satin ribbon diagonally in half, wrap the side corners towards the center, towards the bottom corner.
We turn the sides down, holding the middle of the petal, trim the corner and singe it.
We cut the lower part and singe the edges separately. At this point the petal is ready.
Flower example:
If you turn out the edges of the finished petal, you will get a round inverted petal:
Flower example:
Another version of the petal, to make which you need to singe the edges by folding them together:
Back view:
Flower example:
Double round petal
It folds in exactly the same way as a single one, only we use two squares of ribbon of different colors:
Flower example:
The following photos of the works show rubber bands for the manufacture of which were used: a round petal, a sharp petal, and also a round inverted petal:
I promise to do a master class on these cute jewelry a little later.
This is the lesson: kanzashi for beginners is over for today, I hope that the material will help beginners, and if there is still something that is not clear, ask! Good luck with your experiments and creative inspiration!
Traditional Japanese culture began to take shape in the seventeenth century, after the Tokugawa clan seized power. Geisha, who appeared in the mid-eighteenth century, made a significant contribution to the formation of the image of the Japanese woman. Previously, Japanese women preferred to wear their long, straight hair loose.
 Classic Japanese woman image
Geisha introduced the fashion for high hairstyles of the most unusual shapes. A variety of hair styling tools made it possible to give the hairstyle strength: combs, hairpins, long sticks, etc. Due to the fact that special attention was paid to handicrafts in the geisha school, hair accessories became an excellent basis for embodying the intricate design solutions of Japanese needlewomen.
 A hairstyle with a kanzashi flower looks quite unusual
Bizarre kanzashi flowers began to be increasingly present on the heads of not only geishas, but also ordinary Japanese women from different classes.
Features of Kanzashi
The wearing of this traditional jewelry in those days was regulated by a whole set of rules. The appearance of the kanzashi made of flowers and ribbons had to strictly correspond not only to the woman’s age, but to her place in society.
Japanese women were strictly forbidden to decorate even open parts of the body - the neck and arms, so this decoration became their only opportunity to demonstrate to others their wealth, refined taste and even marital status. Married ladies could wear no more than three kanzashi colors on their heads. Young girls persistently competed with each other in the pretentiousness and high cost of this decoration.
 Japanese women have been decorating themselves with various flowers since ancient times.
At the same time, each month of the year had its own characteristics of their appearance, as well as a special color scheme for kimonos. When creating such jewelry, even the eye color of its owner was taken into account. Some extravagant people inserted more than ten different kanzashi into their hairstyles.
 Kanzashi add zest and the image becomes unique
Kanzashi-style hairpins and hair hoops decorated with flowers have become extremely popular among young people today. Japanese girls wear them for wedding ceremonies, national holidays and children's events. They are also increasingly popular in our country.
What is the basis for this decoration?
For a separate flower or brooch you need a base in the form of a hairpin.
 Hairpins will serve as the basis for decoration
The product must be firmly fixed in the hair, not slipping, not sagging.
 Kanzashi is not just flowers, not just jewelry and hairpins, it is great art
Let's look at the types and features of hairpins on sale:
- "Crocodile" made of iron. Their length ranges from two to ten centimeters. Focus on the thickness of the hair of the future owner of the flower or brooch. For small children, choose short crocodile clips, for adults - medium ones; long ones will help tame a mop of hair. Models with teeth are preferable.
- The hairpin is a cracker. It will hold only the smallest kanzashi flowers on thin strands of hair. Useful for children's jewelry or for creating a subtle nuance in a hairstyle.
- Hoop. Plastic ones are cheaper, but often break. Choose headbands made of metal or rubber that are suitable for any head size and can withstand repeated extension processes. There is a lot of space on the hoop for the needlewoman’s imagination to run wild.
What do kanzashi decorate with now?
To transform the base, needlewomen use a wide variety of materials and tools:
- ribbons made of crepe-satin, satin or organza of various widths;
- the braid is simple, patterned, mesh, in the form of a tube;
- rhinestones, beads, buttons;
- artificial kanzashi flowers, decorative fruits, berries;
- multi-colored threads.
 The greater the number of different materials used for kanzashi, the richer and more beautiful the product will look.
In addition, the work will need:
- scissors, ruler, pencil, sewing needle, small tweezers;
- candle or lighter; — “Moment-crystal” glue or similar;
- fishing line, cord, wire for stringing beads - plain or multi-colored.
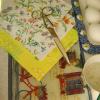
 The process of making a kanzashi flower is truly fascinating.
Types of flowers for decorating kanzashi
Traditionally, kanzashi flowers are made from satin ribbons or organza.
 Satin ribbons for kanzashi
Each petal is curled separately. Then they are connected to each other: threads or glue. Large petals are made easier. They can have a rounded or sharp shape. The technique of folding them is reminiscent of origami. Based on these two types, modern needlewomen have invented a dozen more types of flowers. It is more convenient to twist the petals with tweezers; the middle of the finished flower is decorated with beads, stones, and rhinestones.
 The world of kanzashi - the magic of satin ribbons and silk, the play of bright beads in the hands of a master
The beauty and grace that distinguish flowers for modern kanzashi will not leave any woman indifferent.
 Kanzashi jewelry is imbued with tenderness and beauty
You can make stylish hoops, headbands, wreaths and hairpins with these flowers yourself.

 Kanzashi children's jewelry
The size of the initial square of ribbon for each petal does not exceed 5 cm. Flowers created using natural materials look more vibrant and delicate. When working with artificial ribbons, their edges must be scorched a couple of millimeters. Using this technique you can make not only flowers, but also gorgeous butterflies and dragonflies. Some elements of kanzashi, for example, in the Ukrainian style, are made from a continuous ribbon rather than individual squares.
Features of Slavic flavor
Ukrainian girls did not ignore this needlework technique and successfully adapted it to create national jewelry - wreaths.
 The Ukrainian wreath is part of the Ukrainian national costume
Traditionally, flowers in the form of poppies and daisies are used in combination with bunches of viburnum, tendrils and hop cones.
 Ukrainian wreaths have long been a mandatory addition to women's outfits
A wreath made from a combination of cornflower and lovage is called a wreath of devotion. Flowers in wreaths represent the beauty, health, strength, tenderness and devotion of a woman. For the Ukrainian people, a wreath has long been a traditional amulet.
- not just decoration. This is a kind of amulet against bad and unkind wishes addressed to its owner, a symbol of youth, maiden honor and innocence, eternal love and an infinitely long Ukrainian family.
 Ukrainian wreaths are ethnic accessories that are well known not only in Ukraine itself, but also abroad
In such wreaths, kanzashi style flowers must be adjacent to green ribbons or artificial grasses. Greenery symbolizes vitality. You can make grass stems yourself from the same ribbons, or use artificial grass, sold in handicraft departments or flower shops.
 Ukrainian wreath is not just a decoration, but a talisman
Women have always looked for and found unique ways to transform their appearance, giving it brightness, attractiveness, and uniqueness.
Kanzashi made from ribbons in the style we have discussed are perfect for these purposes. They are quite easy to make, even easier to buy, and the effect they have on others will undoubtedly be enormous. They will perfectly decorate young Ukrainian beauties.
Kanzashi hairpin
Master class: types of sharp petals
Ukrainian ribbon wreath
The specificity of such skill
What do you imagine when you hear or read about beautiful flowers made from satin ribbons? Some people imagine simple gerberas collected from a crossed narrow ribbon, while others imagine an imitation of living roses, which is made by hand and collected by petals. As always, the truth is somewhere nearby - few people make a completely realistic copy of real flowers, there are still artificial ready-made floral compositions for this, but even very simple daisies do not need to be learned - they can be collected simply by inspiration.Making flowers from ribbons is an interesting process. It attracts me because, despite the apparent complexity, in half an hour you will definitely have a flower. Yes, perhaps a little ridiculous (you won’t look at my first roses without pity). But it will work out. This is not knitting, which will kill you for a couple of days, and not miniature painting, which clearly requires talent; here, just watch a master class on creating flowers from ribbons with your own hands and you will get a finished flower.
Almost all flowers from silk ribbons are made in such a way that they are durable. Of course, if you are planning to make simply decorative bouquets, then you do not need special strength, but if you suddenly want to make a beautiful headband as a gift for your child, on which fabric flowers act as decor, then I advise you to make every effort to ensure that the flowers do not got disheveled in the first couple of days.


How to do it
I'll tell you several ways to make flowers. I’ll say right away that the methods are basic, based on them you can make any other flowers that are visually similar to those described by me. By the way, I advise you to try to make fantasy compositions without trying to embody any living flowers - this way you can better feel the technique and its features.Preparation for production
So where do we start preparing? What will you need for the job? Write down:- ribbons of different widths and different colors, I prefer satin ones, they look very elegant;
- good sharp scissors (I use regular tailor's scissors);
- needles and threads of different thicknesses;
- glue gun and several sticks of clear glue;
- a pair of tweezers (those for eyebrows will do, but it’s better to get a good one if you’re going to seriously make flowers).
I prefer to work at a clean table under a table lamp, and I advise you to prepare your workspace - remove all unnecessary things, adjust the light.
Kanzashi
My first acquaintance with flowers took place just when I came to the Kanzashi master class. This mk became my starting point, and I am grateful to the girls who literally in a few hours taught me and a bunch of other girls to make stunning kanzashi flowers from a narrow ribbon, chic kanzashi flowers from satin ribbons of greater width, and gave deep ideas about this technique and its capabilities.What is kanzashi? This is the art of decorating hairpins, which came to us from Japan. Pieces of fabric were folded into the shape of flower petals, and amazing flowers bloomed on the stiletto heels, which could decorate any hairstyle. Now kanzashi are in fashion, so it is not surprising that many girls have mastered this technique.
To work in the kanzashi technique, in addition to the previously described tools, you will also need a ruler, a chalk pencil for cutting (can be replaced with a simple pencil or a sharpened piece of dry soap) and a candle for scorching.
Some girls use a lighter, but it seems to me that a candle gives a more even flame, and you can fold the fabric much more neatly when your hands are free.
In total, three types of petals are used in the kanzashi technique: 
A kanzashi flower made from a 5 cm wide ribbon will be of medium size - you can use it to decorate clothes or a hairpin, decorate a headband or make a beautiful home decor.
How to make different petals:
And how to make kanzashi leaves:
Let's start production 
How to make a kanzashi flower from a 5 cm wide ribbon? The wider the ribbon, the larger the diameter of your flower.
If you want to make a lush flower from ribbons, then I advise you to look at this tutorial:
And these videos show how to combine different shapes of petals, make double petals from satin ribbon with your own hands, and how you can collect not only flowers using the kanzashi technique, but also plants, insects and even small animals. By the way, it is kanzashi that is suitable for making snowflakes - watch the video to make sure.
Melted petals
The following method of making flowers from satin ribbons is suitable for those who want to make a large composition at once; for example, I used this technique to make a basket of flowers for my mother’s anniversary. However, there are some nuances:- melted petals look less neat compared to kanzashi, so you should not use these flowers next to a formal outfit;
- be prepared for the fact that it won’t work out right away;
- Not every ribbon is suitable for making these colors; this can only be determined experimentally.


Step by step instructions
- From cardboard we cut out a pattern in the shape of a plump half-heart (as in the photo below).
- We cut out the petals (you will have to tinker) - at least 6 large ones and the same number of smaller ones and even smaller ones, maybe twice as many of each size.
- Each petal needs to be processed using fire - the edge will bunch up a little and the petal will become voluminous.
- Then the petals are collected on the central thread, arrange them symmetrically, with a slight overlap, so that the flower looks voluminous, and it is best to collect them in a checkerboard pattern (see photo below).
- Several beads are attached to the center on a string to imitate the middle.
- Your flower is ready.
Simple flowers
Very simple and at the same time expressive fabric flowers can be made in just a few minutes. If you have never tried to make flowers from ribbons, then you will definitely succeed with this tutorial.How to make flowers in five minutes?
- Cut the tape into pieces of 5-10 centimeters. You can take identical pieces, or you can use pieces of different lengths, then the flowers will be more natural.
- We carefully melt the sections on a candle - so as not to fray. Make sure that you don’t get dark, sloppy sagging.
- Along the bottom part we make a loose stitch with a strong thread (it is better to use a medium-sized needle so as not to make too large holes.
- We tighten each segment to get a petal.
- We collect the resulting petals using color - we use small pieces in the middle, larger ones closer to the edges.
- Glue the middle into the center.
- You can decorate flowers with narrow white ribbons - for example, make stamens or centers.
- We put the collected flowers into a composition and glue them to the base.
A few words about embroidery
Since we are talking about crafts made from ribbons, it is worth mentioning this type of needlework as ribbon embroidery for beginners. To be honest, before I became interested in this type of needlework, I thought that simple patterns were embroidered from a narrow satin ribbon. No matter how it is! Embroidery is done not only using thin ribbons; very wide ones are also used - they drape beautifully and allow you to get volume.

Why I like this technique:
- It’s easy to achieve the desired result thanks to beautiful materials;
- Ribbon embroidery is highly valued among admirers;
- 3D embroidery is done very quickly.
What are the benefits of schemes? Despite the fact that all needlewomen initially embroider the same pictures, the embroidery you make will be unique - firstly, because you choose the colors yourself, and secondly, because the ribbons are the material that needs to be draped. Well, look for yourself - there are more than five shades in each picture, and each will have to be draped in its own way, which means that the volumetric elements will be different. Don’t want to do what someone else has already done before you? Embroider small flowers according to your own sketches.
Extraordinarily delicate and airy ribbon embroidery of wild flowers - I am sure that this is the best gift for any holiday, especially if you add meadow herbs to the wild flowers.
I really like the ribbon embroidery of wildflowers - the pictures are not too big, smaller than a landscape sheet, but very delicate and expressive. And for the first embroidery, I advise you to take a simple pattern and ribbons less than a centimeter.
Lessons and master classes for inspiration
How to make cute flowers from ribbons: a master class for the little ones - using this master class we made flowers with our daughter, she really liked it.Festive flowers from satin ribbons: a medium difficulty master class - make chic decorative flower arrangements for the holiday, decorate your home and gifts for loved ones.
And a few more simple ones: Now you know how to make a flower from a ribbon - even for a headband, even for a dress, even for gift wrapping. Experiment with different techniques, share the results and collect entire hand-made bouquets!