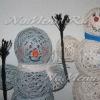
We knit a cactus in a pot. Knitted cactus - pincushion Crochet cactus in a pot
You will need: for pots - leftover yarn of different colors, as well as white mohair and black or gray wool mixture (the yarn should not be thin); for cacti - green yarn; for flowers - pink and yellow melange; N 3; molds for pots (for example: plastic containers for dessert).
Description of cacti
Crochet pots: start knitting from the bottom, to do this, knit a chain from the VVP, close it into a ring, knit in a circle, increasing the RLS in 5-6 places, changing the places where the loops are added. Do this until the diameter of the bottom becomes equal to the diameter of the bottom of the mold. Next, knit RLS in height in the round, without adding loops. During the knitting process, frequently apply work to the form; if necessary, gradually add loops so that the workpiece takes on the shape of the form.
- interesting selection for the site!!!
- *** Crochet flower patterns for decorating products
Cactus 1.
Knit from top to bottom, to do this, knit a chain from the VVP, close it into a ring, knit in a circle, increasing the RLS in 3-4 places, changing the places where the loops are added. Knit several rows evenly in the shape of a cylinder and begin to decrease evenly, reducing the number of stitches.
Knitted flower: knit with yellow melange, close 3 ch into a ring, 5 sc, knit in a circle in the shape of a cylinder 5p., adding 1-2 stitches in each row. Last row of petals: * 10VP, 1СБН*, from * to * repeat as needed.
Cactus 2.
The cactus is knitted from melange obtained by combining green yarn and white mohair. Knit according to the same principle as “Cactus 1”, making decreases and increases in stitches, modeling the shape of a cactus.
Knitted flower: For the base, cast on 3 VPs with green yarn, close into a ring, 5 sc, knit in a circle in the shape of a cylinder with an even fabric 8 r, switch to yellow yarn and knit 1st row: 2 sc in one loop; 2nd row: no additions: 3rd row: evenly add 6 stitches. Last row of petals: *10VP, 1 RLS*, from * to* repeat as needed. Use orange threads to make stamens.
Cactus 3.
Knit from bottom to top. Cast on a chain of 15 VPs, tie 35 double crochets (s/n). Next, knit with relief stitches. There should be 5 ribs in the cactus; to do this, knit *6 concave columns (behind the back wall, 1 convex column (behind the front wall)*. From * to * repeat 5 times. Knit 5-6 rows with an even fabric. Start decreasing: in each r. along the 1st concave stitch - in each space between the ribs, tie the remaining 5 stitches to one vertex, pull the thread inward.
Knitted flower: knit with pink melange, close 3 VP into a ring, 8 sc, 3 r. knit with extension. 1r. decrease loops after one.
Soil: knitted from melange obtained by combining gray yarn and white mohair, knitted according to the same principle as the bottom for pots, starting from the base of the cactus.
Assembly: tightly fill the shapes of cacti and pots with synthetic padding polyester or other material; for weighting, you can put a small stone in the pot. Sew details, sew on flowers, do embroidery on pots.
Many people love flowers. But you don’t always want to take care of them, and sometimes you don’t have enough time for it at all. Therefore, you can buy artificial flowers in the store and decorate your interior with them. Or you can knit the flowers yourself. In this master class we will crochet a beautiful blooming cactus. We will knit a small cactus to decorate the interior, but this craft can also be used as a pincushion. If you want to knit a larger cactus, then you need to initially cast on more loops and make more incremental rows when knitting a cactus pot. Master class How to crochet a cactus Suitable for both beginner knitters and more experienced knitters.
To crochet a cactus we will need:
- Yarn (green, yellow, pink and sand);
- Hook;
- Needle;
- Sintepon.
How to crochet a cactus master class.
The base of the cactus is a rectangle. We will crochet it in st.b.n.
First, let's cast on eighteen stitches. And now we will proceed to the first row.

We knit the first row. In it we will knit one st.b.n. into each loop.

And now we’ll make an air loop at the end of the row to unwind the knitting and start the second row.
In the second row we will knit the same st.b.n. But they need to be knitted at the back of the loops.
At the end of the second row we will again make one aerial for the turn and the beginning of the third row.
We will perform this and all subsequent rows, like the previous one, using the back walls of the loops.
Knitting behind the back walls promotes the formation of ribbed rows.

The length of the rectangle should be twice its width. You can determine this by eye.

Now we need a needle to sew a cactus. We thread a thread of the same color as the rectangle itself into the eyelet. And we collect loops on top of it.
We pull them together well. And we make a knot.

Then we sew the side of the cactus down to the very bottom. We stuff it with padding polyester. And now we collect the lower loops onto the thread. We pull them together and make a knot.
Original gift:
We will end up with a ball.

And first we take the yellow yarn. We make five air loops. And then we knit a row of st.b.n.

We will cast on five loops and make a dc. into the very first loop so that a loop of air chain is formed.
Let's cast on five more loops and knit another dc at the same point. And so we will knit all five petals.

We place the pink part of the flower on the yellow one. And we sew it on.

You can also make stamens. To do this, simply cut a couple of short strips of pink and yellow yarn and sew them to the middle.
And bookmark this idea for Easter:
All that remains is to tie the pot. And we knit it with sand-colored yarn.
We knit a circle. First we knit six st.b.n. In the second row there are two st.b.n. in the loops. So we will have twelve st.b.s.
One row must be knitted behind the far walls (back) of the loops.
We knit another row, but for the entire loop.
Then we knit an increase in the row through two loops. And we will perform the new row without increments.
Then we will knit increases through four loops. And a row without them.
And we finish knitting one row with increases through five loops and one row without them.

You can put a cardboard circle on the bottom. Then the pot will be more stable.
We fill the pot with padding polyester. And carefully sew the cactus to the pot. It is better to sew it with thin threads and a neutral color so that the seams are invisible.
We hide or cut off the excess threads.

Now you know how to crochet a cactus and easily decorate your home with such cute decorations!
Finally, we can please flower lovers. After all, with the help of this pattern they will be able to crochet a cactus. This unusual prickly flower is native to the tropics and is most common in Mexico. Cacti were brought to our region back in the time of Peter I. Since then, many gardeners have been breeding this unpretentious plant.
Well, for those who love crocheted flowers, the amigurumi cactus is a great idea. Author of the scheme Lyubov Ponomarenko described each step in detail. The flower can be made in any shade. In addition, the toy can also be used as a convenient and beautiful pincushion.
Idea for a knitted pincushion
and amigurumi cactus knitting pattern
To complete this product you will need:
- yarn of green, purple, white, light and dark brown colors;
- filler (I have holofiber);
- two beads for the eyes (you can simply embroider them with black thread;
- hook No. 2;
- a needle for sewing knitted items and a thin one for the eyes;
- marker;
- a plastic disk for decorating the bottom (I cut it out of the packaging of a children's photo album)
Legend:
RLS - single crochet
PR - increase (two sc in one loop)
UB - decrease (knit two sc together)
СС - connecting post
v.p. - air loop
Main part of the cactus (green):
2nd row - 6 PR (12)
Row 3 - (RS, PR)*6 (18)
Row 4 - (2 RLS, PR)*6 (24)
Row 5 - (3 RLS, PR)*6 (30)
Row 6 - (4 RLS, PR)*6 (36)
Row 7 - no changes (36)
Row 8 - (5 RLS, PR)*6 (42)
Rows 9-15 - no changes (42)
Row 16 - (5 RLS, UB)*6 (36)
Row 17 - (4 RLS, UB) * 6 (30)
Row 18 - (3 RLS, UB)*6 (24)
Row 19 - (2 RLS, UB)*6 (18)
Fasten and cut the thread.
Cactus shoot (green):
Row 1 - 6 sc in amigurumi loop
2nd row - 6 PR (12)
Row 3 - (RS, PR)*6 (18)
Rows 4-6 - no changes (18)
Row 7 - (4 RLS, UB)*3 (15)
Row 8 - (3 RLS, UB)*3 (12)
Pot (light brown):
Knitting starts from the bottom.
Row 1 - 6 sc in amigurumi loop
2nd row - 6 PR (12)
Row 3 - (RS, PR)*6 (18)
Row 4 - (2 RLS, PR)*6 (24)
Row 5 - (3 RLS, PR)*6 (30)
Row 6 - (4 RLS, PR) * 6 (36). Make a ss and 1 ch.
7th row - so that the number of loops does not decrease by one, we continue knitting from the same loop from which our ch. We knit 36 sc behind the back wall of the loop. Now we can prepare our disk for the bottom by cutting out a circle of the appropriate diameter.
8-9 row - no changes (36)
Row 10 - (17 RLS, PR)*2 (38)
11-12 row - no changes (38)
Row 13 - (18 RLS, PR)*2 (40)
Row 14 - no changes (40)
15 row 40 RLS behind the front wall of the column. Thus, on the wrong side we have an additional row for knitting the ground. In general, I don’t like sewing parts together, so this option is much more convenient for me. (photo 3)
Row 16 - (18 RLS, PR)*2 (42)
Row 17 - no changes (42)
Fasten the thread and cut it. We hide the remaining tail in knitting.
Earth:
First, place a plastic disk on the bottom of the pot and fill the part halfway. To make knitting more convenient, you can unscrew the top of the pot, as shown in photo 4.
1st row - for the line formed on the inside of the pot, we knit with dark brown yarn 40 RLS.
2nd row - (8 RLS, UB) * 4 (36)
3rd row - (4 RLS, UB) * 6 (30)
4th row - (3 RLS, YUYU) * 6 (24)
Row 5 - (2 RLS, UB)*6 (18)
We fasten and cut the thread, leaving the required length for sewing two parts - the pot and the base. We stuff the part completely.
Flower:
small (white):
8 sc in amigurumi loop, make a sl st with the first loop in the ring. Then we knit 5 ch. and in the second loop from the hook we knit 1 sc, then 3 more along the chain and 1 sc in the same loop from which the petal “grows”. And so on 7 more times. In total we get 8 petals. At the end we make a SS and fasten the thread, leaving the necessary length for sewing two flowers.
large (purple):
Row 1 - 8 sc in amigurumi loop
2nd row - 8 PR (16)
3rd row - RLS, 6 ch, in the second RLS loop from the hook, 4 more RLS along the chain and 1 RLS in the same loop of the base of the second row, from where the petal begins to “grow”. So we knit another 15 petals. We finish knitting the SS, cut the thread, leaving the required length for sewing on the flower.
Eyes (2 parts with white thread):
Row 1 - 6 sc in amigurumi loop
2nd row - 6 PR (12)
Row 3 - no changes (12)
Fasten and cut the thread, leaving the required length for sewing.
ASSEMBLY and design:
We stuff the cactus with filler and sew the “earth” and the cactus together. We stuff and sew on the small “appendage”. We sew two flowers together with white thread from the first flower (the top white one). Then we sew the flower itself to the cactus with purple thread. We mark a place for the eyes and, having filled them with filler, pin them with pins so that they “don’t run away.” Sew or embroider black pupils and make a smile (optional).

A cactus pincushion can be crocheted in just a couple of hours. A knitted cactus serves as decoration, a gift, a toy or a household item - a convenient pincushion :)
To crochet such a cactus, you must be able to make: convex embossed stitches (ch.st.s1n.), concave embossed posts (vg.st.s1n.), single crochet stitch (dc.s1n.), single crochet ( st.b.n.), connecting posts (s.s.), air loops (v.p.), increases (PR.), decreases (UB.).
To work you will need:
- yarn for hook No. 3, green (preferably “grass”);
- yarn for crochet hook No. 3 brown (earth);
- thin yarn for crochet hook No. 1, scarlet;
- yellow yarn for stamens;
- old plasticine or pebbles (to make the pot heavier);
- a small flower pot (its size should be in harmony with the size of the associated cactus);
- foam sheet;
- glue capable of gluing a knitted fabric to a sheet of foam plastic (I use liquid nails).
How to crochet a cactus:
The work can be roughly divided into several stages:
- knitting a cactus,
- knitting a cactus flower,
- preparing the pot,
- knitting the earth and stuffing the needle bed,
- final assembly.
Knitting a cactus

- 5v.p. combine into a ring.
- 2 ch.p. on the rise.
- 11st.s1n. in the middle of the ring, s.s. in the 2nd ch. the beginning of the row.
- 2 ch.p. on the rise. In each column of the previous row we knit treble s1n. and vp.st.s1n. At the end of the row s.s. in the 2nd ch. chains of the beginning of the row.

- 2 v.p. on the rise. In each st.s1n. of the previous row we knit 2vg.st.s.s1n., in each ch.st.s.s1n. knit the previous row in ch.st.s.s1n. At the end of the row s.s. in the 2nd ch. chains of the beginning of the row.
- 2 v.p. on the rise. In every year st.s1n. of the previous row we knit 1vg.st.s.s1n., in each ch.st.s.s1n. of the previous row we knit 1ch.st.s1n. At the end of the row s.s. in the 2nd ch. chains of the beginning of the row.
- We repeat step 6 until we tie the body of the cactus to the desired height + 1-2 cm, since when stuffing the cactus will become wider and lose a little in height.
- We start knitting a cactus flower from an amigurumi ring secured with an air loop.

- We knit 6 stitches inside the ring. We tighten the ring.
- In the second row of the cactus flower we knit only 6 increments BEHIND THE BACK WALL OF THE LOOP, i.e. in each column of the previous row we knit 2 tbsp.
- Let's start knitting a petal. We do 5 in...
- ... insert the hook into the 2nd loop from the hook and knit 4 stitches in a row along the chain.

How to crochet a cactus flower
- Let's do s.s. BEHIND THE BACK WALL into the base of the chain and into the next loop in the knitting direction.
- We repeat paragraphs. 11-13 until we knit 12 petals of the outer edge BEHIND THE BACK WALL OF THE LOOP, 12 petals BEHIND THE FRONT WALL OF THE LOOPES of the second row and 6 petals behind the front wall of the loops of the first row.
- It turns out to be a fluffy flower. Now we begin to make the stamens.
- Cut 15 cm of yellow yarn. From the same ball we wind 10 turns around our finger, remove the ring and cut it in half with scissors. We lay a bunch of short stamen threads crosswise on a 15-centimeter thread and tie it in half - these are the stamens that need to be crocheted into the middle of the cactus flower.

Forming a knitted cactus
- We tie it at the top and slightly to the side of the cactus body.
- We stuff the cactus with padding polyester. Around the last row we make decreases in each pair of stitches.
- Attach the brown thread and make the first row of soil BEHIND THE BACK WALL of the loops of the last green row. This will rotate the knitting 90 degrees. Gradually add loops in subsequent rows so that the “ground” is level. The diameter of the circle should be equal to the diameter of the pot just below the top.
- Place pebbles or plasticine at the bottom of the pot to weigh it down. We cut out a circle of polystyrene foam on top and insert it tightly into the pot. We pour any suitable glue on top of the foam (I actually used liquid construction nails) and glue the “earth” with a flower onto it.
- It’s logical to stick a lot of needles or pins into the pincushion, which will only increase the attractiveness of the toy :)
Shared master class
Anastasia Kononenko
Crocheted artificial plants will be an excellent gift or decoration for your own home. They turn out to be especially necessary where live pets simply cannot grow - in shaded areas of the apartment, in the kitchen equipped with a loggia. Blooming cacti will bring a touch of good mood and a sunny day to any home.
What you need to take for two cacti:
-Green yarn (wool with acrylic) – 100 g.
-Hook No. 1,2.
- Yarn “Iris” in white, yellow, pink.
-Any brown yarn for soil.
-8 large yellow beads.
-4 small golden beads.
-Small pink beads or needles with beads.
-Toothpicks.
-Filler for cacti.
-Some foam for the potty.
-2 flower pots.
-2 sticks approximately 30 cm long.
How to tie cacti:
The base for both cacti is done the same way. A chain of six chain stitches is made and closed into a circle:
The second row consists of twelve double crochets:

The third row will have twenty-four columns, half in relief. This is done as follows: first, three air loops are cast on:

Then the hook is inserted through the column of the previous row:

And knit an ordinary double crochet:

The next column is a regular one, then a relief column is made under its own base. This is what you should get:

The third row needs to be knitted in the same way, increasing the number of loops. There should be forty-eight:

The fourth row contains the same forty-eight loops. But now the front embossed loops alternate with the back ones. When making knit stitches, the hook goes under the column like this:

In the case of reverse stitches, the tool is inserted from the reverse side of the fabric:

As a result, the canvas resembles an elastic band:

Completed fourth row:


In the fifth row, loops are added again, the total number increases to seventy:

Top view:

The next two rows do not contain any changes (they contain 70 columns):

In the eighth row, it is necessary to reduce the number of loops by knitting two stitches together until the total number is reduced to sixty-three. The ninth row also has sixty-three columns. The tenth row is again a decrease to fifty-six. From the eleventh to the fifteenth row the number of loops does not change. In the sixteenth row of columns there will be forty-nine, in the seventeenth the same. That's it, the base for the cactus is ready:

This is what it looks like inside:

Now you can take the filler and thoroughly fill the body of the plant:


A rolled sheet of foam rubber is placed in the pot chosen for the cactus. In principle, you can take any other filler, even rolled paper:

Any hard plastic stick, twig, or piece of branch is inserted into the center.


A circle of cardboard or thin foam rubber is placed on top, equal to the diameter of the pot:


This is what should come out:

The next stage is making soil. To do this, you need to knit an even circle from brown yarn according to the pattern below:

The soil is not attached to the pot in any way, it is simply carefully laid out on a layer of foam rubber.

You can simply “pin” the cactus from above, but it’s better to sew it to the soil:

This is what a flower in a pot looks like:

The flowers of cacti will be different. For the first option you will need pink and white “Iris”. Each flower consists of two layers. The bottom one, pink, is performed according to the following scheme:

Finished flower layer:

Upper, white, slightly smaller in size:


This is what the almost finished flower will look like:

All that remains is to decorate it with a pink bead:

In total you will need eight of these flowers. They can be sewn to the cactus or attached using a needle with a bead at the end. For cactus needles you will need ordinary toothpicks:

They are stuck into the first cactus in random order:

The flowers for the second cactus are a little more complicated. They are also two-layer, knitted according to the following pattern:

For the first flower, you should make two layers. The first one is made of white “Iris”, with five petals.
Read also...
- Russian Buddhists celebrate the New Year according to the lunar calendar. When is the Sagaalgan holiday?
- Big Kinder Surprise with your own hands How to make a Kinder surprise from chocolate
- How to give yourself a short haircut
- Original hairstyles with elastic bands for girls Easy hairstyles with small elastic bands